


Overview
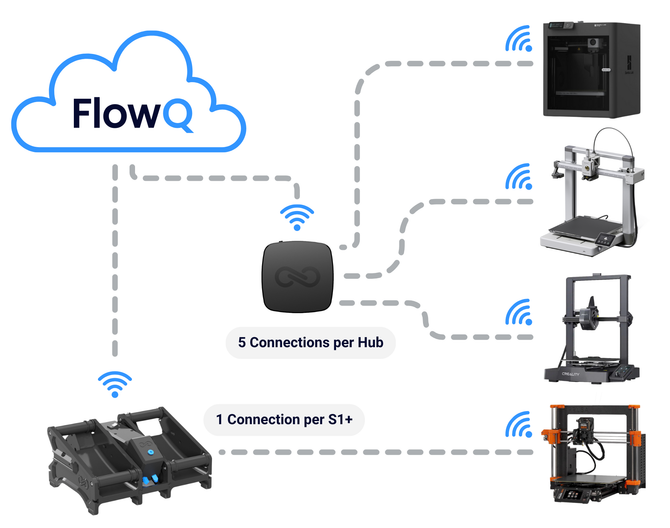
The S1 Plus can be used as a secure tunnel to connect a single 3D printer to FlowQ’s cloud-based automation platform. When connected, the S1 Plus provides encrypted communication between your printer and FlowQ, enabling full remote control, automated print queue management, and continuous monitoring.
During setup, users must select a default filament profile and a preload force.
Preload force:
Determines how much pressure the S1 Plus applies to the filament during operation. Higher force helps overcome friction, blockages, and long Bowden tubes, while lower force reduces wear on Bowden tubes and components.
Filament profile:
Represents the filament currently loaded into the S1 Plus and is used for tracking filament usage accurately across prints.
Only one printer can be connected to an S1 Plus. Any printer using the S1 Plus as its tunnel will inherit its filament profile, and only files with a matching filament profile will be routed to the printer.
Setting Up the S1 Plus
Set up the S1 Plus using this guide. Ensure the power switch is turned on and the lights are on.
Ensure your Wi-Fi network has internet access and that your printer is on the same network the S1 Plus will connect to.
Connecting the Hub to Wifi
1. Log into your FlowQ account and navigate to the S1+ tab.
2. Click Add S1+
3. Press and hold the Bluetooth button on the S1+ until the LEDs begin flashing blue.
4. On a computer (not a phone or tablet), click Search Devices in the FlowQ interface. Select S1-Server from the Web Bluetooth popup and click Connect.
5. Name the S1+, then select a filament profile to use on the S1+.
-
-
-
If you do not have a filament profile, select none. You will need to create one in the Filament tab of FlowQ later to track filament usage.
-
-

6. Enter your 2.4 GHz Wi-Fi network name and password. Wait for the S1+ to connect to Wi-Fi.
-
-
-
If an error occurs, please make sure your wifi credentials are entered correctly. For further help, reference the troubleshooting steps at the end of this guide.
-
-

7. If an update is required, the S1+’s light will turn white during the process. Once complete, check that the S1+ shows as online in FlowQ.
-
-
-
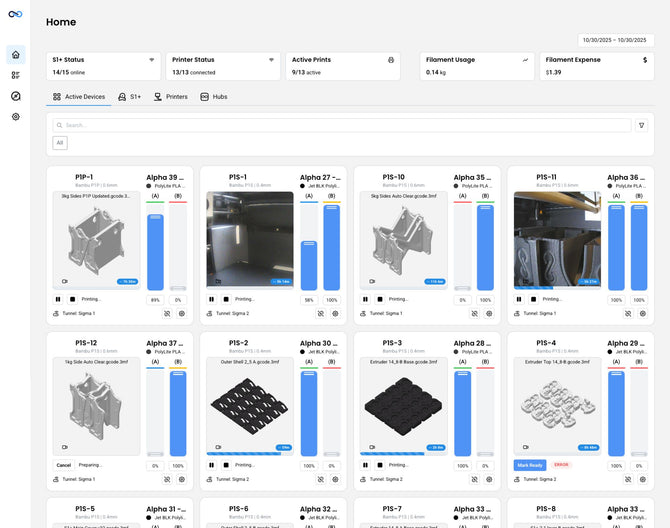
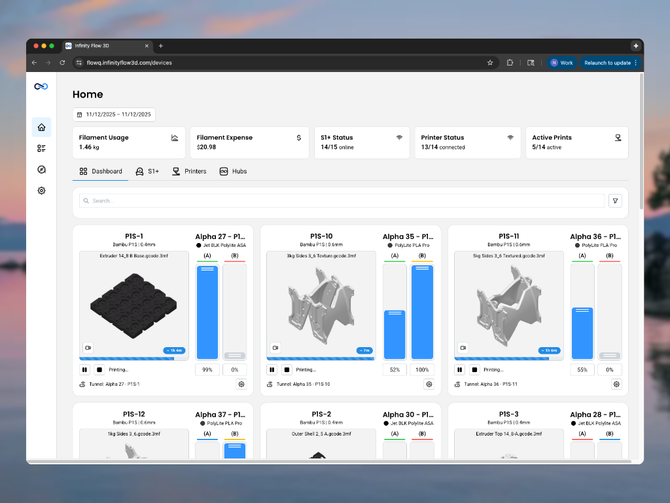
The Status of the S1+ will be displayed on this table along with the firmware version and update status.
-
The circle next to the firmware version indicates the update status.
-
-
🔵 Blue - Update Available
⚪️ Grey - Update Scheduled (The S1+ is waiting to update until the next time the S1+ is completely empty or in sleep mode to prevent print failures. The update may take up to 10 seconds to start once one of these states is reached)
🟠 Orange - Update in Progress
No Dot - The firmware is up to date, no update available.

8. To select a preload force, click on the settings icon to edit your S1+. Higher force helps overcome blockages and long Bowden paths, while lower force reduces wear on Bowden tubes. Most setups work well with the “Standard” setting.
Assigning A Printer to your S1+
⚠️ Your S1+ must be updated to firmware version v1.0.0 or newer in order to connect to a printer. S1+’s with firmware version v0.31 or earlier may be affected by a bug and need to be manually updated using this guide.
1. Go to the Printers tab in FlowQ. Add a new printer or select an existing printer to edit.
2. Under the Tunnel section, open the dropdown menu and select your S1+ from the list.
-
-
-
If the S1+ is already connected to a printer, it will not appear in the dropdown.
-
-

Light Behavior
🔵 Flashing blue: S1+ is in Bluetooth mode.
🔵 Solid blue: S1+ is connected via web Bluetooth.
⚪️ White: Firmware update in progress.
🔴 3 Blinking Red Lights (not repeating): Firmware update failed error.
See all other light states in this guide.
Troubleshooting
Web Bluetooth pairing fails (device not appearing):
-
-
You must use a computer with Chrome or Edge; mobile devices are not supported.
-
Ensure Bluetooth is enabled on your computer.
-
Make sure the Hub is in Bluetooth mode (flashing blue).
-
Move closer to the Hub to improve Bluetooth signal strength.
-
Refresh the page or restart your browser if the device list does not appear.
- Use a Windows PC or Mac is recommended for Web Bluetooth provisioning. Linux operating systems may have problems with web-bluetooth connectivity.
-
Wi-Fi provisioning fails:
-
-
The Hub only supports 2.4 GHz Wi-Fi networks.
-
If using a combined 2.4/5 GHz SSID, try creating a temporary 2.4 GHz-only network.
-
Move the Hub closer to your router to ensure a stronger signal.
-
Double-check that the Wi-Fi password is correct.
-
Restart your router if it has reached its device limit.
-
Hub goes offline unexpectedly:
-
-
Verify that the Hub is still powered with a green light indicating that it is on.
-
Power cycle the Hub and allow it to reconnect.
-
Check your router for network changes or Wi-Fi interruptions.
-
Move the Hub to a location with a better signal.
-
Delete the Hub from your FlowQ account and re-add it if connectivity issues persist.
-
